How To Make Any Recipe Gut-Healthy


Tell me if this has ever happened to you…
You see a recipe that looks amazing. You click on it, fingers crossed.
Will the ingredients all work for me?
One by one, you read them, getting more and more excited. And then, there it is: some food you just cannot eat, ruining the entire recipe for you.
And I’m not talking about conventional recipes. I mean when you’re already looking at healthy recipes and they still don’t work for you!
I know I’m being a little dramatic here, but when you’re eating a restricted diet, it can be incredibly frustrating to try to find new recipes that work.
And when boredom with the recipes you do have sets in, you’re more likely than ever to stray from eating the foods that support your health and make you feel your best.
That’s why, today, I want to talk about modifying recipes to work for your healthy gut diet.
Every Healthy Gut Diet Is Unique
Something we’ve always said is that the best diet is the one that is customized to you and your unique needs.
What works for me, won’t necessarily work for you. John can tolerate nuts, but Sally can’t. Sally is fine with eggs, but they give John room-clearing gas. And on and on.
This is why it’s critical you go through an elimination and reintroduction diet to find the perfect diet customized to you.
(If you need help with this, check out our Solving Leaky Gut program.)
The problem with this is that people who write recipes (including us!) use ingredients that work for them. And those ingredients may or may not work for you.
So, today I want to share some of the most common swaps – for eggs, nut flours, and dairy – you’ll need to modify healthy gut recipes to work for your unique diet.
Gelatin As An Egg Substitute

Want to bake, but can’t tolerate eggs? For baked recipes – like cookies or pancakes – that call for 1-3 eggs, you can substitute gelatin eggs.
Eggs play 2 roles in baked goods: they lend structure and the yolk’s healthy fat provides moisture.
Gelatin eggs mimic the structure regular eggs lend to baked goods, but they don’t have the same amount of fat. You may need to add extra fat to baked goods when using gelatin eggs, especially if the recipe calls for more than 3 eggs.
There’s an added bonus to gelatin eggs, though: gelatin has tons of health benefits – especially for the gut. Gelatin can help heal inflammation of the gut lining and close the tight junctions that open when a leaky gut develops.
But the type of gelatin you use matters. Look for a plain, unflavored, grass-fed gelatin. The 2 brands we like are Vital Proteins (in the green tub) and Great Lakes (in the red canister). Don’t substitute collagen peptides for the gelatin – collagen peptides dissolve in liquid and won’t work for creating structure in baked goods.
For each regular egg you’re replacing, you’ll need 1 tablespoon of gelatin and 3 tablespoons of water.
- Place the gelatin in a small bowl and add 1 tablespoon warm water.
- Stir well to moisten the gelatin with the water (it won’t be entirely dissolved).
- Then add 2 more tablespoons of hot water and whisk to dissolve the gelatin. You should have a thick but smooth mixture.
- Let the gelatin egg sit for 3 minutes, then add to your recipe as you would a regular egg.
2 Nut Flour Substitutes
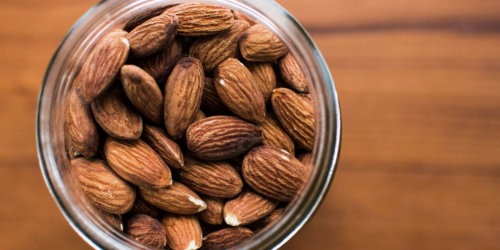
Nut flour is one the most common ingredients in “healthy“ recipes. It’s used for everything from making a crispy coating for chicken and fish to healthy cinnamon rolls.
So, if you’re avoiding nuts – or just trying to cut back on how much nut flour you eat – it can be really hard to find exciting recipes that work.
Luckily, there are MANY more grain-free flour options available today than there were even just a few years ago. And if you understand a bit about them, you can swap out nut flours for other flours in just about any recipe.
I use a combination of two grain-free flours to substitute for nut flours: coconut flour and tapioca flour.
Coconut flour is made from (you guessed it!) coconuts. It is lower in carbohydrates than many other alternative flours and very high in fiber. It is also VERY absorbent – coconut flour is like a sponge and soaks up an incredible amount of liquid.
Tapioca flour is made from the cassava root. Cassava is also known as manioc or yuca and is also what is used to make tapioca pearls – the kind you might have had in pudding.
To approximate the texture of nut flours, I use a 1:3 ratio of coconut flour to tapioca flour. If that ratio is confusing to you, think about it like this: take whatever amount of nut flour called for and divide by 4. Use 1 part coconut flour and 3 parts tapioca flour.
For example, if a recipe calls for 1 cup of almond flour, I’d use ¼ cup coconut flour and ¾ cup tapioca flour as a substitute.
Remember that even with healthy foods, “the dose makes the poison.” Occasionally, foods made from tapioca and coconut flour can be a fun way to add variety to your diet. But if you start eating them every day, you will miss out on other, more-nutrient-dense foods – and potentially set yourself back from healing.
How To Make Dairy-Free Options

Most gut-healthy diets are dairy-free.
But some – like the Specific Carbohydrate Diet – allow specific types of dairy, like 24-hour yogurt.
And many gut-healing diets allow grass-fed butter, too.
What’s the deal with that? How can some dairy be OK while other types are off-limits?
First, as with any food, there is the issue of quality.
Most dairy products in the United States come from conventional dairies. Cows are kept in unsanitary conditions and fed an unnatural diet of foods like corn and soy. They’re often treated with antibiotics and artificial growth hormones, too. Then, the milk is pasteurized at high heat and stored in plastic jugs.
If you’re lucky enough to get your hands on high-quality, naturally-produced dairy products, you’ll recognize the difference immediately. Grass-fed dairy products are richer and more yellow in color. And many people who can’t tolerate traditional dairy products are able to tolerate grass-fed natural products like raw milk.
Secondly, preparation makes a big difference, too. Properly prepared 24-hour yogurt is virtually lactose-free. This is important, as many people who don’t tolerate milk are reacting to the lactose sugar in milk. When the lactose is consumed by microbes during the fermentation process, they are able to enjoy all the health benefits of 24-hour yogurt without any symptoms.
Lastly, I’ve noticed a huge group of people who react to the whey and casein proteins in dairy. This is why 24-hour yogurt isn’t right for everyone and lactose-free products often still cause problems.
So, maybe it’s the quality of the dairy, maybe it’s the preparation methods, maybe it’s the carbohydrates or proteins – regardless, it’s out for now, so what can you do?
Ghee is a great alternative to grass-fed butter that you can make at home. It is usually well-tolerated even by the most sensitive individuals. If made correctly, it should be carbohydrate and protein free. However,If you’re uncertain about eating ghee, you should always talk to your doctor first.
To make ghee, you simply:
- Melt grass-fed butter in a heavy pot over medium heat.
- Allow the butter to melt completely and foam two times. This usually takes about 10-15 minutes. Once the second foam has simmered away, the butter will be a bright gold color and there will be browned milk solids at the bottom of the pan.
- Strain the melted butter through cheesecloth to remove the milk solids, and you have made ghee.
Ghee can be stored at room temperature in an airtight container.
For those who want the probiotic benefits of 24-hour yogurt but can’t tolerate dairy, coconut milk yogurt is a great alternative. In this version, we thicken it with gelatin to make a creamy coconut yogurt. The sugar is consumed entirely in the fermentation process and the resulting yogurt is unsweetened.
Thickened 24-Hour Coconut Milk Yogurt
Ingredients:
- 3, 14 oz cans coconut milk (look for one without added ingredients like this)
- 1 teaspoon sugar, honey, or maple syrup
- 1 tablespoon gelatin
- Yogurt starter (we recommend this one)
- 24-hour yogurt maker
Directions:
- Place coconut milk, gelatin, and sugar in saucepan. Heat slowly, while whisking, over medium-low heat until the coconut milk thickens and the temperature reaches about 100°F.
- Remove from heat and pour into yogurt maker vessel. Add yogurt starter and slowly whisk in. Place lid on yogurt maker and allow to ferment for 24 hours at 100°F.
- After 24 hours fermenting, place the tub (don’t stir it yet!) in the fridge to set for 6 hours. The yogurt will separate into layers in the fridge, so stir to combine before eating. Enjoy!
Simple Food Is The Foundation

I hope these substitution ideas make more recipes accessible for you.
But I also want to remind you that the foundation of any healthy diet is simply prepared, whole foods. If you need more help finding the gut-healthy diet for you, make sure you check out this resource.
– Steve
P.S. What substitutions do you use? Share with us in the comments.
Did You Like this Article?
Subscribe to our newsletter to receive email notifications, some ways to find relief, and next steps.
